
How to build an R-package in under 10 minutes!
R-packages are a great way to structure and share code. Let’s give it a try!

Where to start from
Most of the times you already have some R-code that is oranised as functions. In this example we start with a very simple function hello() that is stored in a file called hello.R
hello <- function(name = "my friend") {
   paste("Hello", name)
}
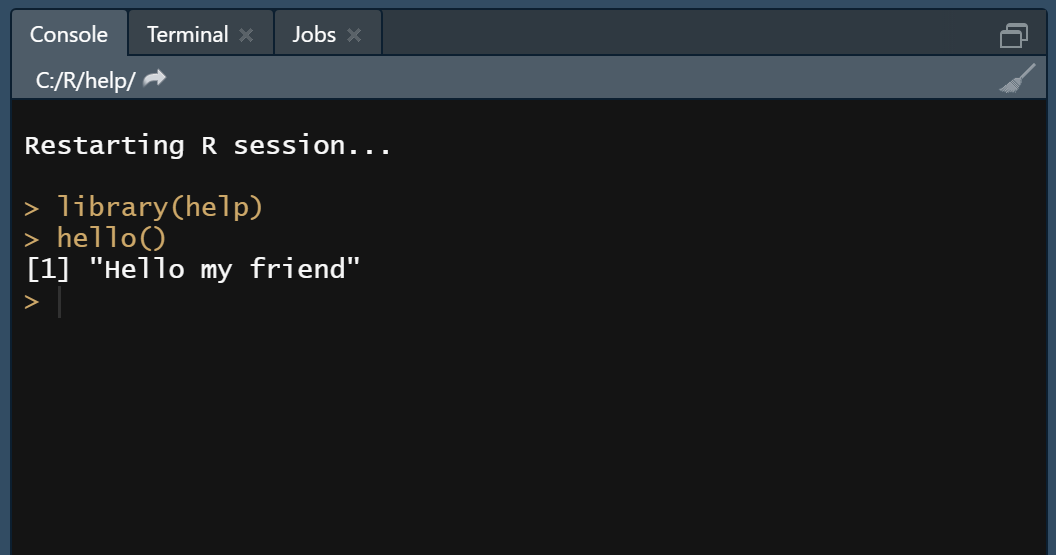
So, if you call hello() you get
[1] "Hello my friend"
If you call hello("Tom") you get
[1] "Hello Tom"
Build a package
Step 1: Create a new R-project
Start RStudio and create a new project:
File > New Project ... > New Directory > R Package
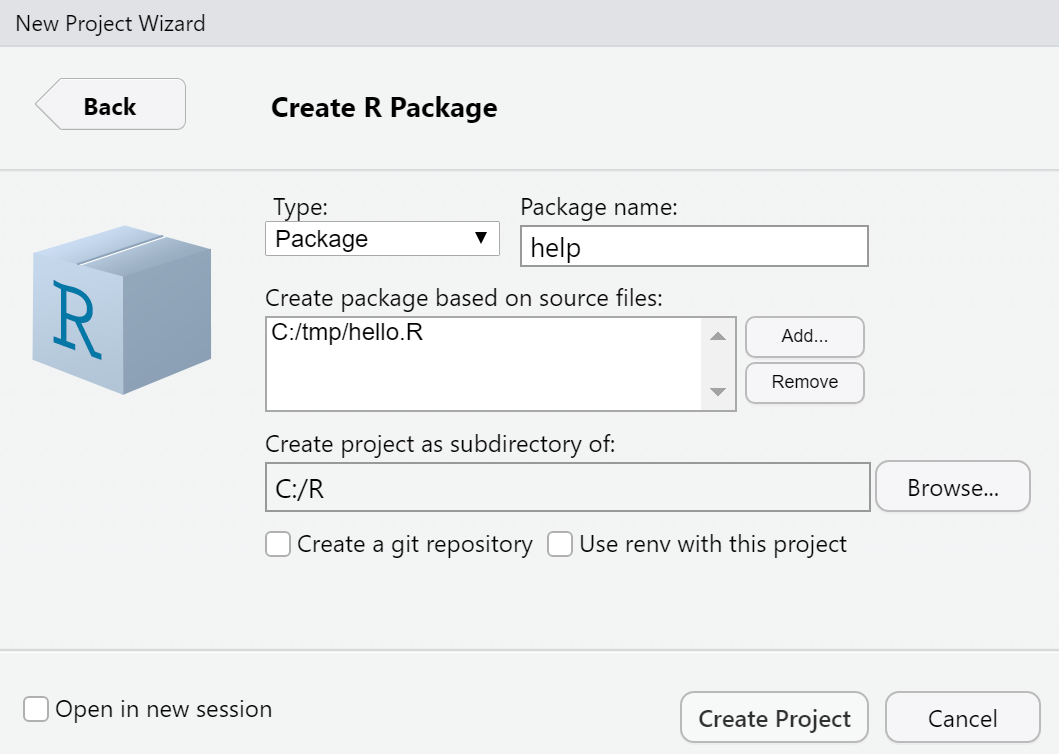
Enter the name of the package, the files containing R-functions you want to use in the package, and define the package-folder.
Then you should have a new “Build” section in the upper right pane.
Step 2: Update DESCRIPTION
Now you can describe what yourt package does, by editing the file DESCRIPTION:
Package: help
Type: Package
Title: What the Package Does (Title Case)
Version: 0.1.0
Author: Who wrote it
Maintainer: The package maintainer <yourself@somewhere.net>
Description: More about what it does (maybe more than one line)
    Use four spaces when indenting paragraphs within the Description.
License: What license is it under?
Encoding: UTF-8
LazyData: true
So, typically you edit at least Title, Author, Maintainer and Description
If you are using other packages in your code, you need to add a section called Imports: with all package-names seperated by a comma. In your code you need to refere to functions of a package as package::function().
If you want to use a license, you can do that with the following R-code (in the R-console, name is the name of the copyright holder). If {usethis} is not installed, do that before.
usethis::use_mit_license(name = "Roland Krasser")
Step 3: Build package
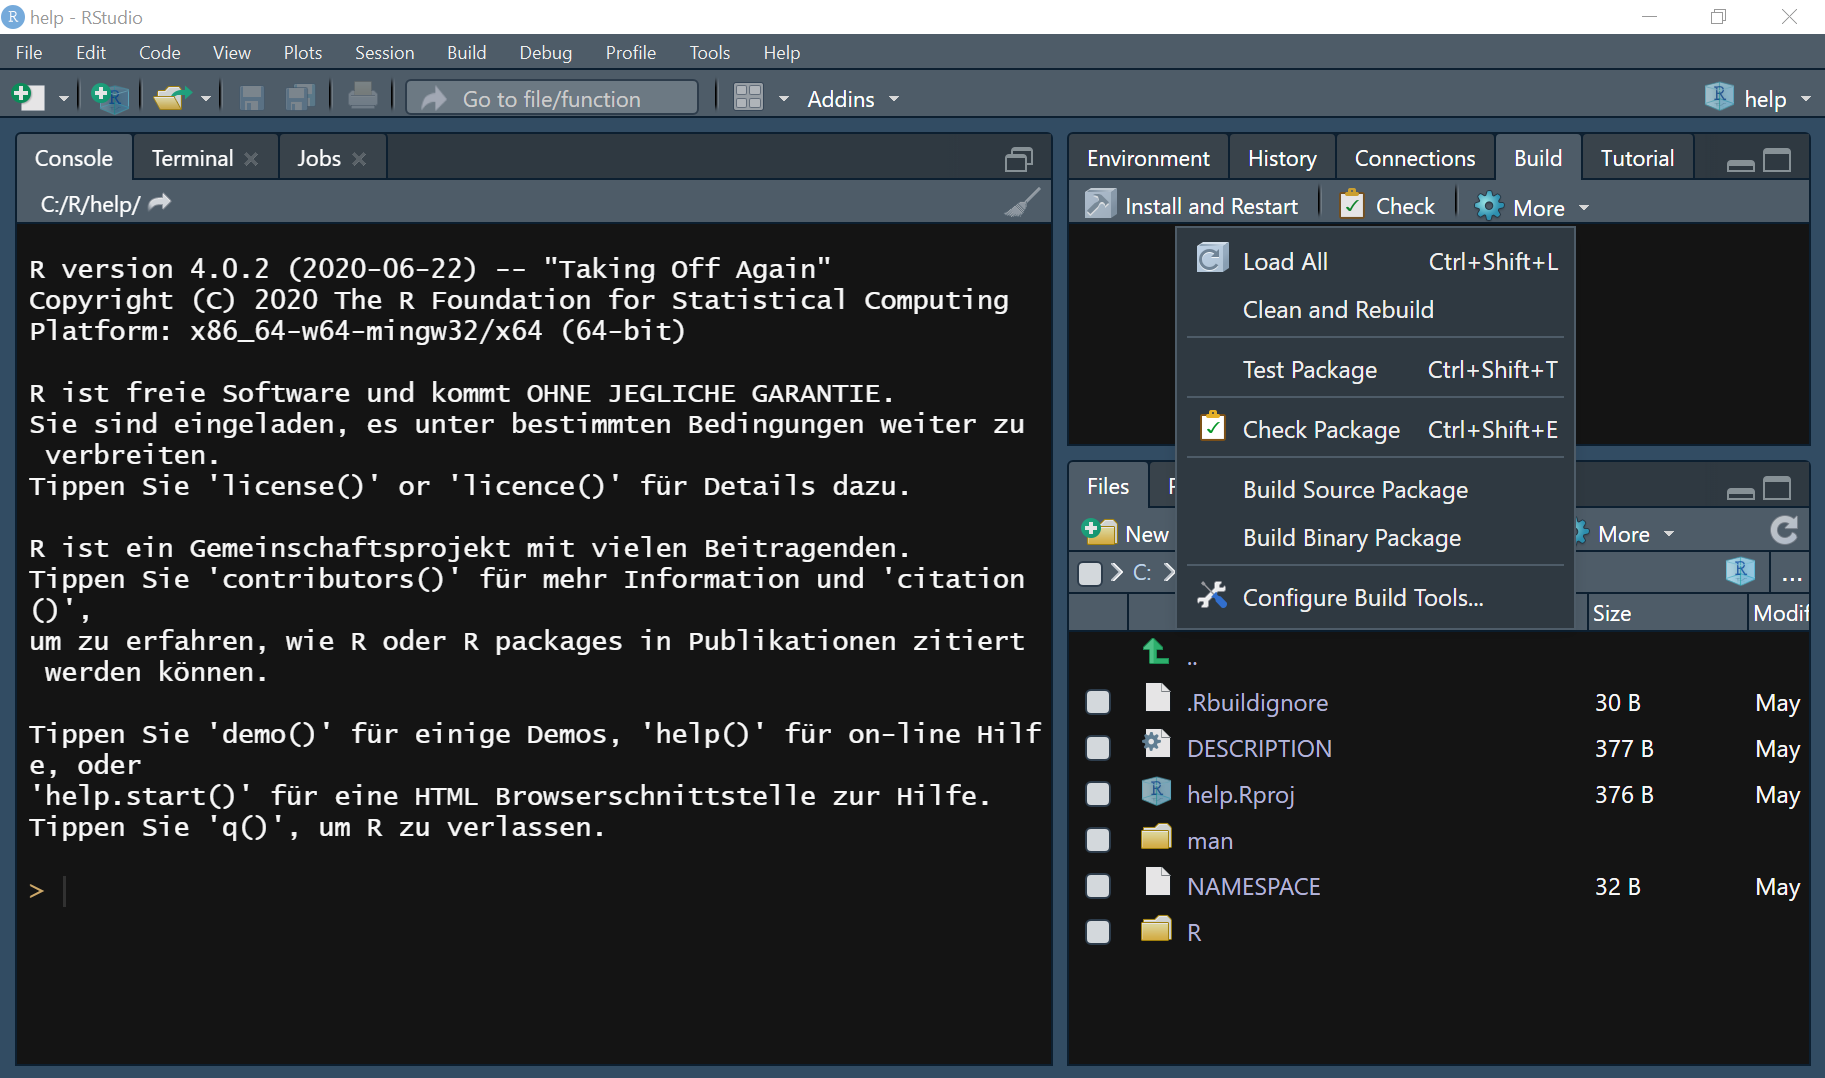
Simply press the Install and Restart button in the Git-Tab (upper right pane)
After a while, your new package {hello} is built and ready to use!
Step 4: Add documentation
To add a documentation to your function, open the file R/hello.R, go to the top of the function and select Code > Insert Roxygen Skeleton
from the menu.
Your function now looks like this:
#' Title
#'
#' @param name
#'
#' @return
#' @export
#'
#' @examples
hello <- function(name = "my friend") {

  paste("Hello", name)

}
Now you can edit the description
#' Say hello
#'
#' @param name Name of the person to say hello
#'
#' @return text
#' @export
#'
#' @examples
#' hello()
#' hello("Tom")

hello <- function(name = "my friend") {

  paste("Hello", name)

}
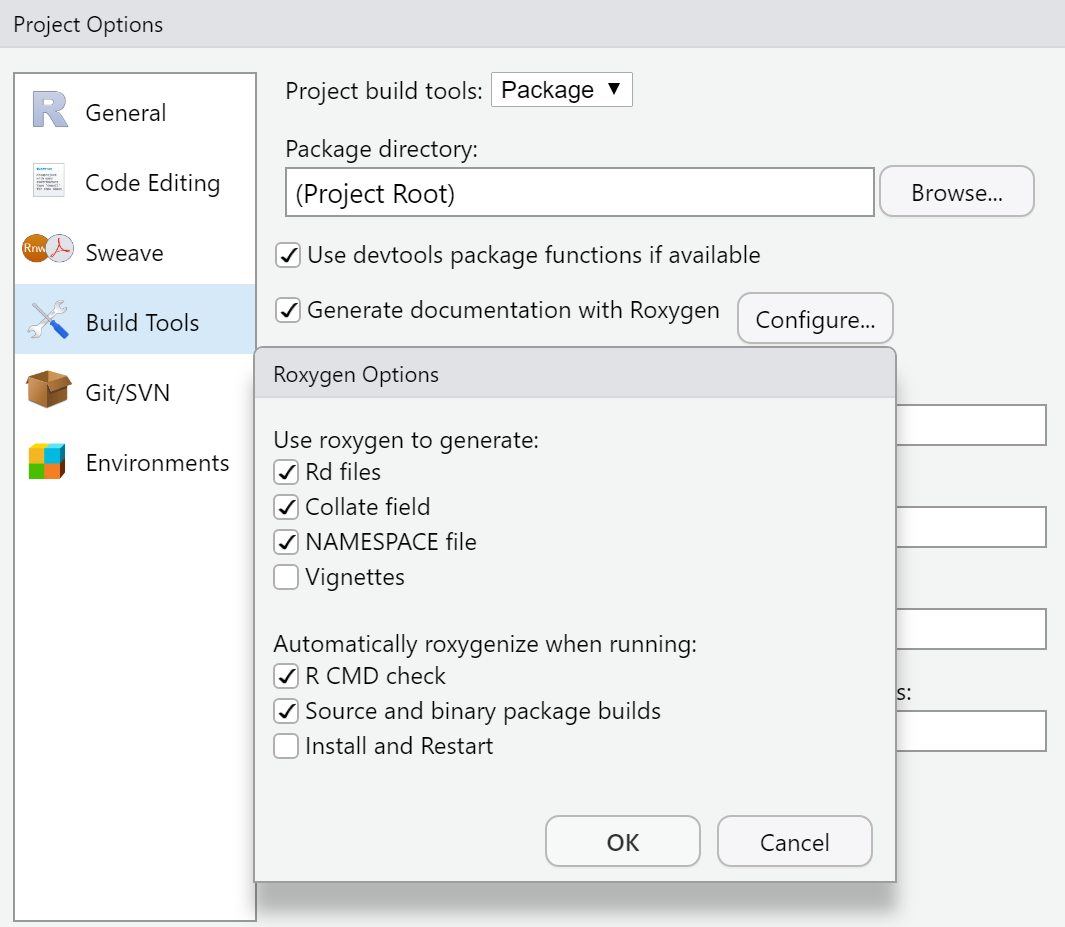
To “activate” the documentation, you need to go to Tools > Project Options and then select Build Tools and activate Generate Documentation with Roxygen
Then you can create the documentation (Build tab: More > Document) und install the package (now containing help files)
Step 5: Add Unit Testing
To use unit testing, run this R-code in the R-console (you may change “hello” to what you want to test in your package)
usethis::use_testthat()
usethis::use_test(name = "hello")
Now you have a new tests folder
You can add tests to your test-file (in this case tests/testthat/test-hello.R)
test_that("hello", {
  expect_equal(hello(), "Hello my friend")
  expect_equal(hello("Tom"), "Hello Tom")
})
To run the tests, go to the Build-Tab and select More > Test Package:
√ |  OK F W S | Context
√ |   2       | hello

== Results ================================================
Duration: 0.1 s

OK:       2
Failed:   0
Warnings: 0
Skipped:  0
Advanced
There is a lot more you could do, specially if you want to put your package on CRAN
Take a look here: https://r-pkgs.org/